| Home Links My Slim Jim's My Gear How to's Files |
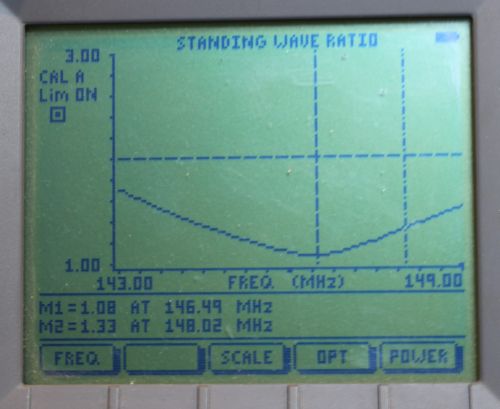
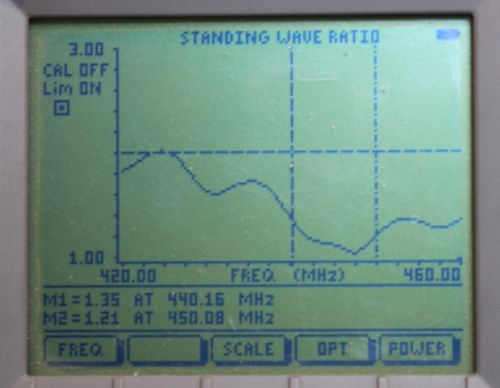
Click the following image to visit the new web store. The content on this page has been migrated to the new web store. I will leave this page up for historical reasons. Handmade Slim Jim Antenna's by N9TAX Let me start by saying that since discovering the slim jim antenna design I have really come to respect these antennas. The design uses a matching system like a j-pole antenna. This is called the j integrated match (jim) the antenna itself is very slim hence the name Slim Jim. Designs for these antennas date back to the early 1930's the best I can tell. I have found them in QST magazine as far back as the 1940's. I started building these antennas and selling them because I saw no one else with a commercial product like this and I figured that I would help fill a gap. The antennas have become a great success thanks to a lot of hard work and some very dedicated customers. Before I get into the specifics of the antennas I first want to thank everyone who has purchased or helped promote this wonderful product. Without you none of this would be possible. The basic Slim Jim is an end fed folded dipole. It has a radiation pattern peaking between 5 and 8 degrees above the horizon. It is this and this alone that makes this one of the best terrestrial communications antennas I have ever seen for the price. The layout of the antenna is as follows.  The top section is 1/2 wave the bottom is 1/4 wave matching section. The antenna is fed near the bottom and the feedpoint impedance is 50 ohms. Ladder line was an excellent choice for these antennas as it presented two well spaced parallel conductors and is virtually indestructable. 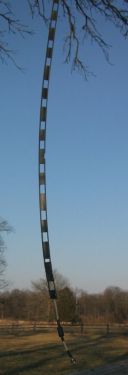 You can hang the antenna in many places. The only exception is near metal objects. They will interfere with the tuning and performance of the antenna. Hanging it up against drywall or plaster as many people do will also affect the antenna but if this is your only option it will still perform adequately. Open free space is the best of all options and as with all antennas will yield the best performance. Enter the Dual Band antenna. After many requests for a dual band version of this antenna. I searched the internet and books high and low to no avail. I then began research on what it would take to make this antenna perform well on 2m and 70cm. What I came up with was a trapped end fed folded dipole. The antenna acts like a slim jim on 2m and a jpole on 70cm. 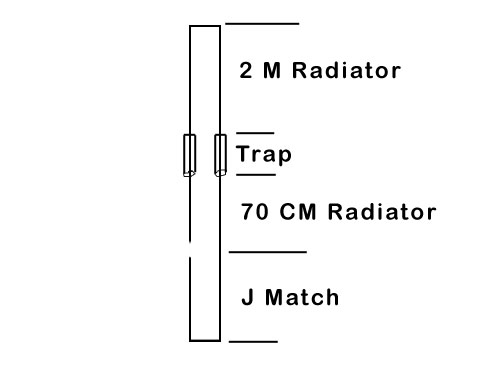 The secret formula I will leave for the history books. But this design yields excellent results compared to many other dual band antennas. The best I can tell there is no compromise to the performance on 2 meters in fact some claim it works better on 2 than the single band vhf (I have yet to scientifically prove that). Some ask well dont j-poles resonate on the third harmonic of 145mhz anyway? First this antenna is in the j-pole family but is not a true j-pole. Second J-poles will resonate on 440 without traps but realistically for lack of a better term they suck. If anyone tries to sell you an un-modified j-pole and says it is a dual band antenna they are wrong they dont work, I have seen swr of 3:1 on unmodified j-poles on the 70cm band! So what are my SWR's Well I have a really nice meter that spits out some great charts to show the band sweeps on these antennas. Here is the 2m side. 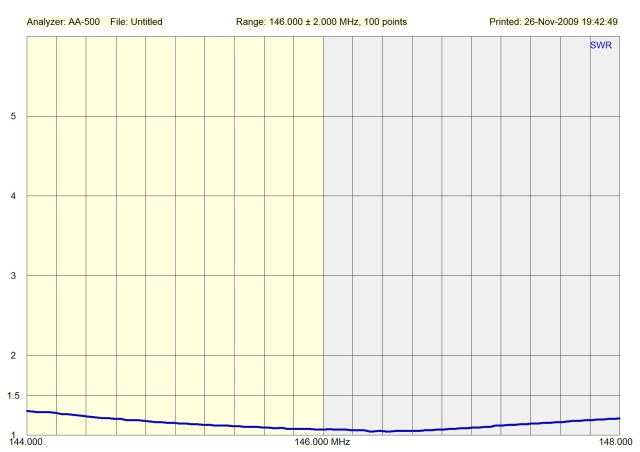 And the 440 plot 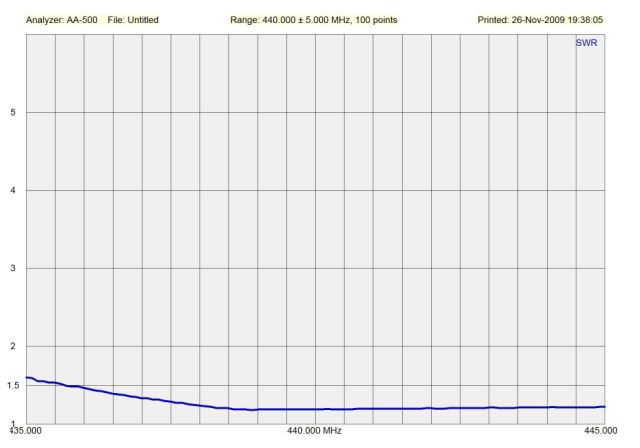 Just a little disclaimer here this plot was taken with N connectors throughout the system. Your mileage will vary a bit with other connectors. Dont get me wrong this antenna will perform fine with pl-259's but they do introduce impedance bumps at higher frequencies. The Bow UPDATE 7/2/2012 There have been a few customers lately that have broke their antennas by putting them in bow mounts under too much pressure. There should be very little pressure in the antenna. This can be achieved a number of ways. 1st I always suggest the use of the thin (not sch 40) 3/4" pvc. It is easier to bow and does not keep as much pressure on the antenna. The 2nd method is to pre-bend the bow. This can be achieved by overbending the bow with string wire or rope and then putting it in the hot sun for a few days or using a heat gun to permanently shape the plastic. Here is a photo that one of my customers sent me about pre-bending the bow. 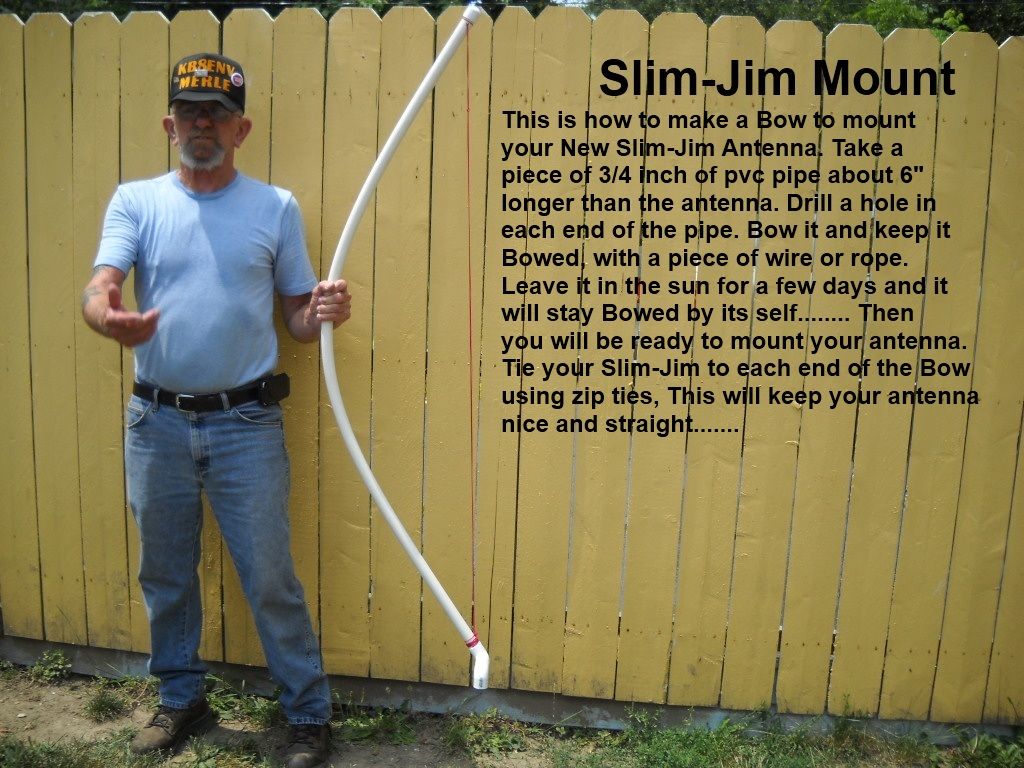 Original BOW info One thing I get a lot of requests for is a way to rigidly mount this antenna for mast or tower mounting. Most people want to mount the antennas inside pvc. This makes them extremely hard to tune because the velocity factor of pvc is not predictable. I have developed a solution that may not be the prettiest but is definitely usable. I call it the bow and anyone can build one. It consists of a piece of 3/4" pvc about a 6" longer than the antenna two 90 degree elbows another foot of pvc and a few zip ties. Basically you drill holes in the ends of the long piece of pvc and bow it to the length of the antenna and zip tie the ends to the holes you just made. 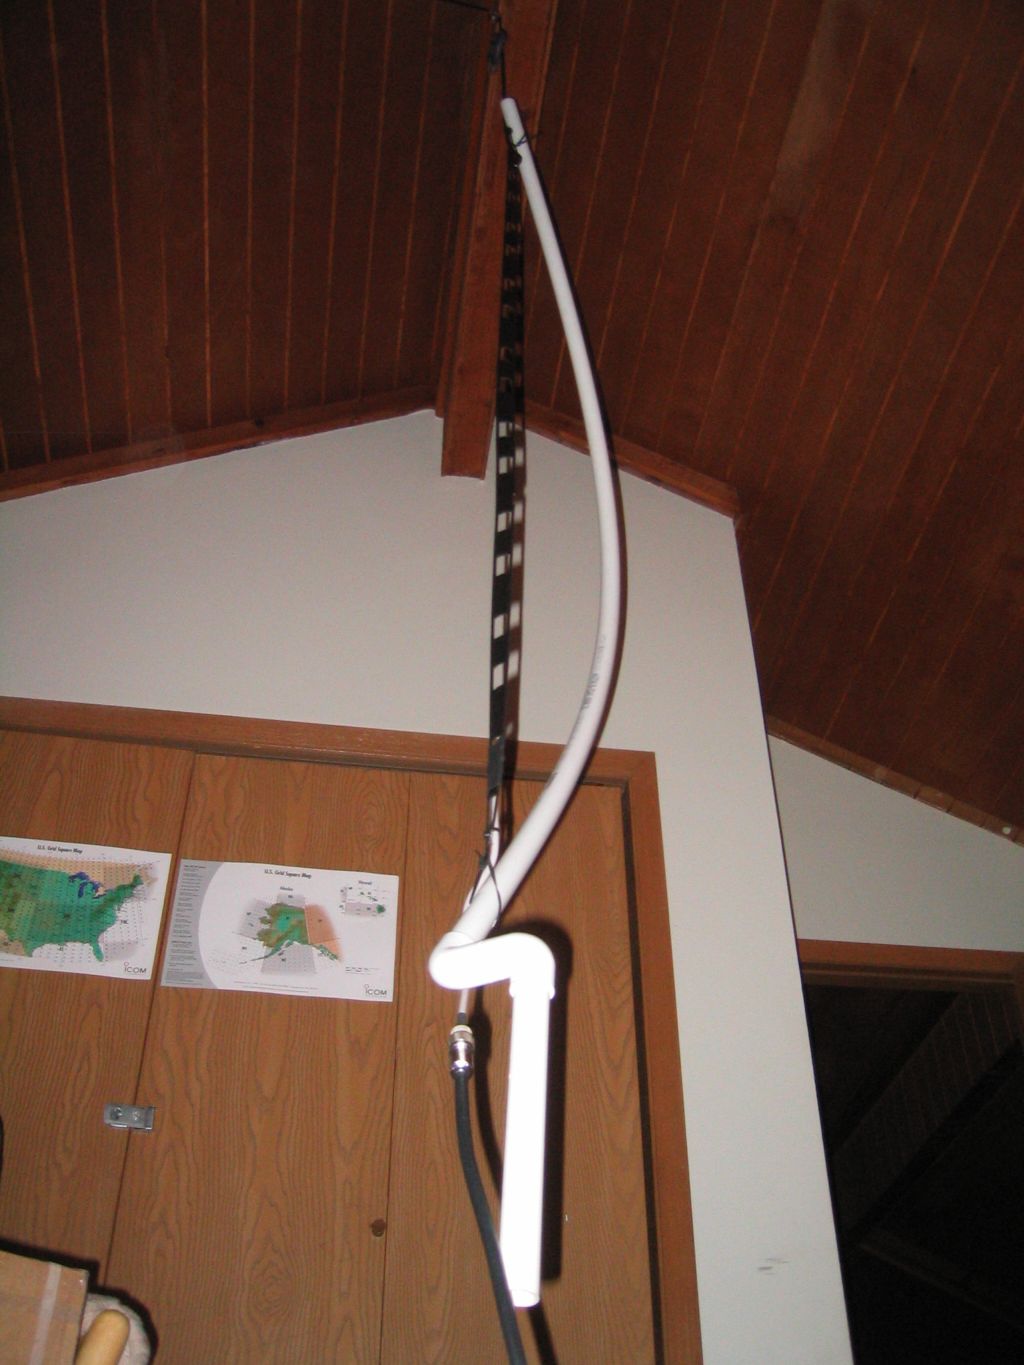 Affix the elbows as on the bottom to bring the short piece parallel with the antenna and you have a rigid mount that will not interfere with the antenna's tuning. Here is a photo of mine on my tower. 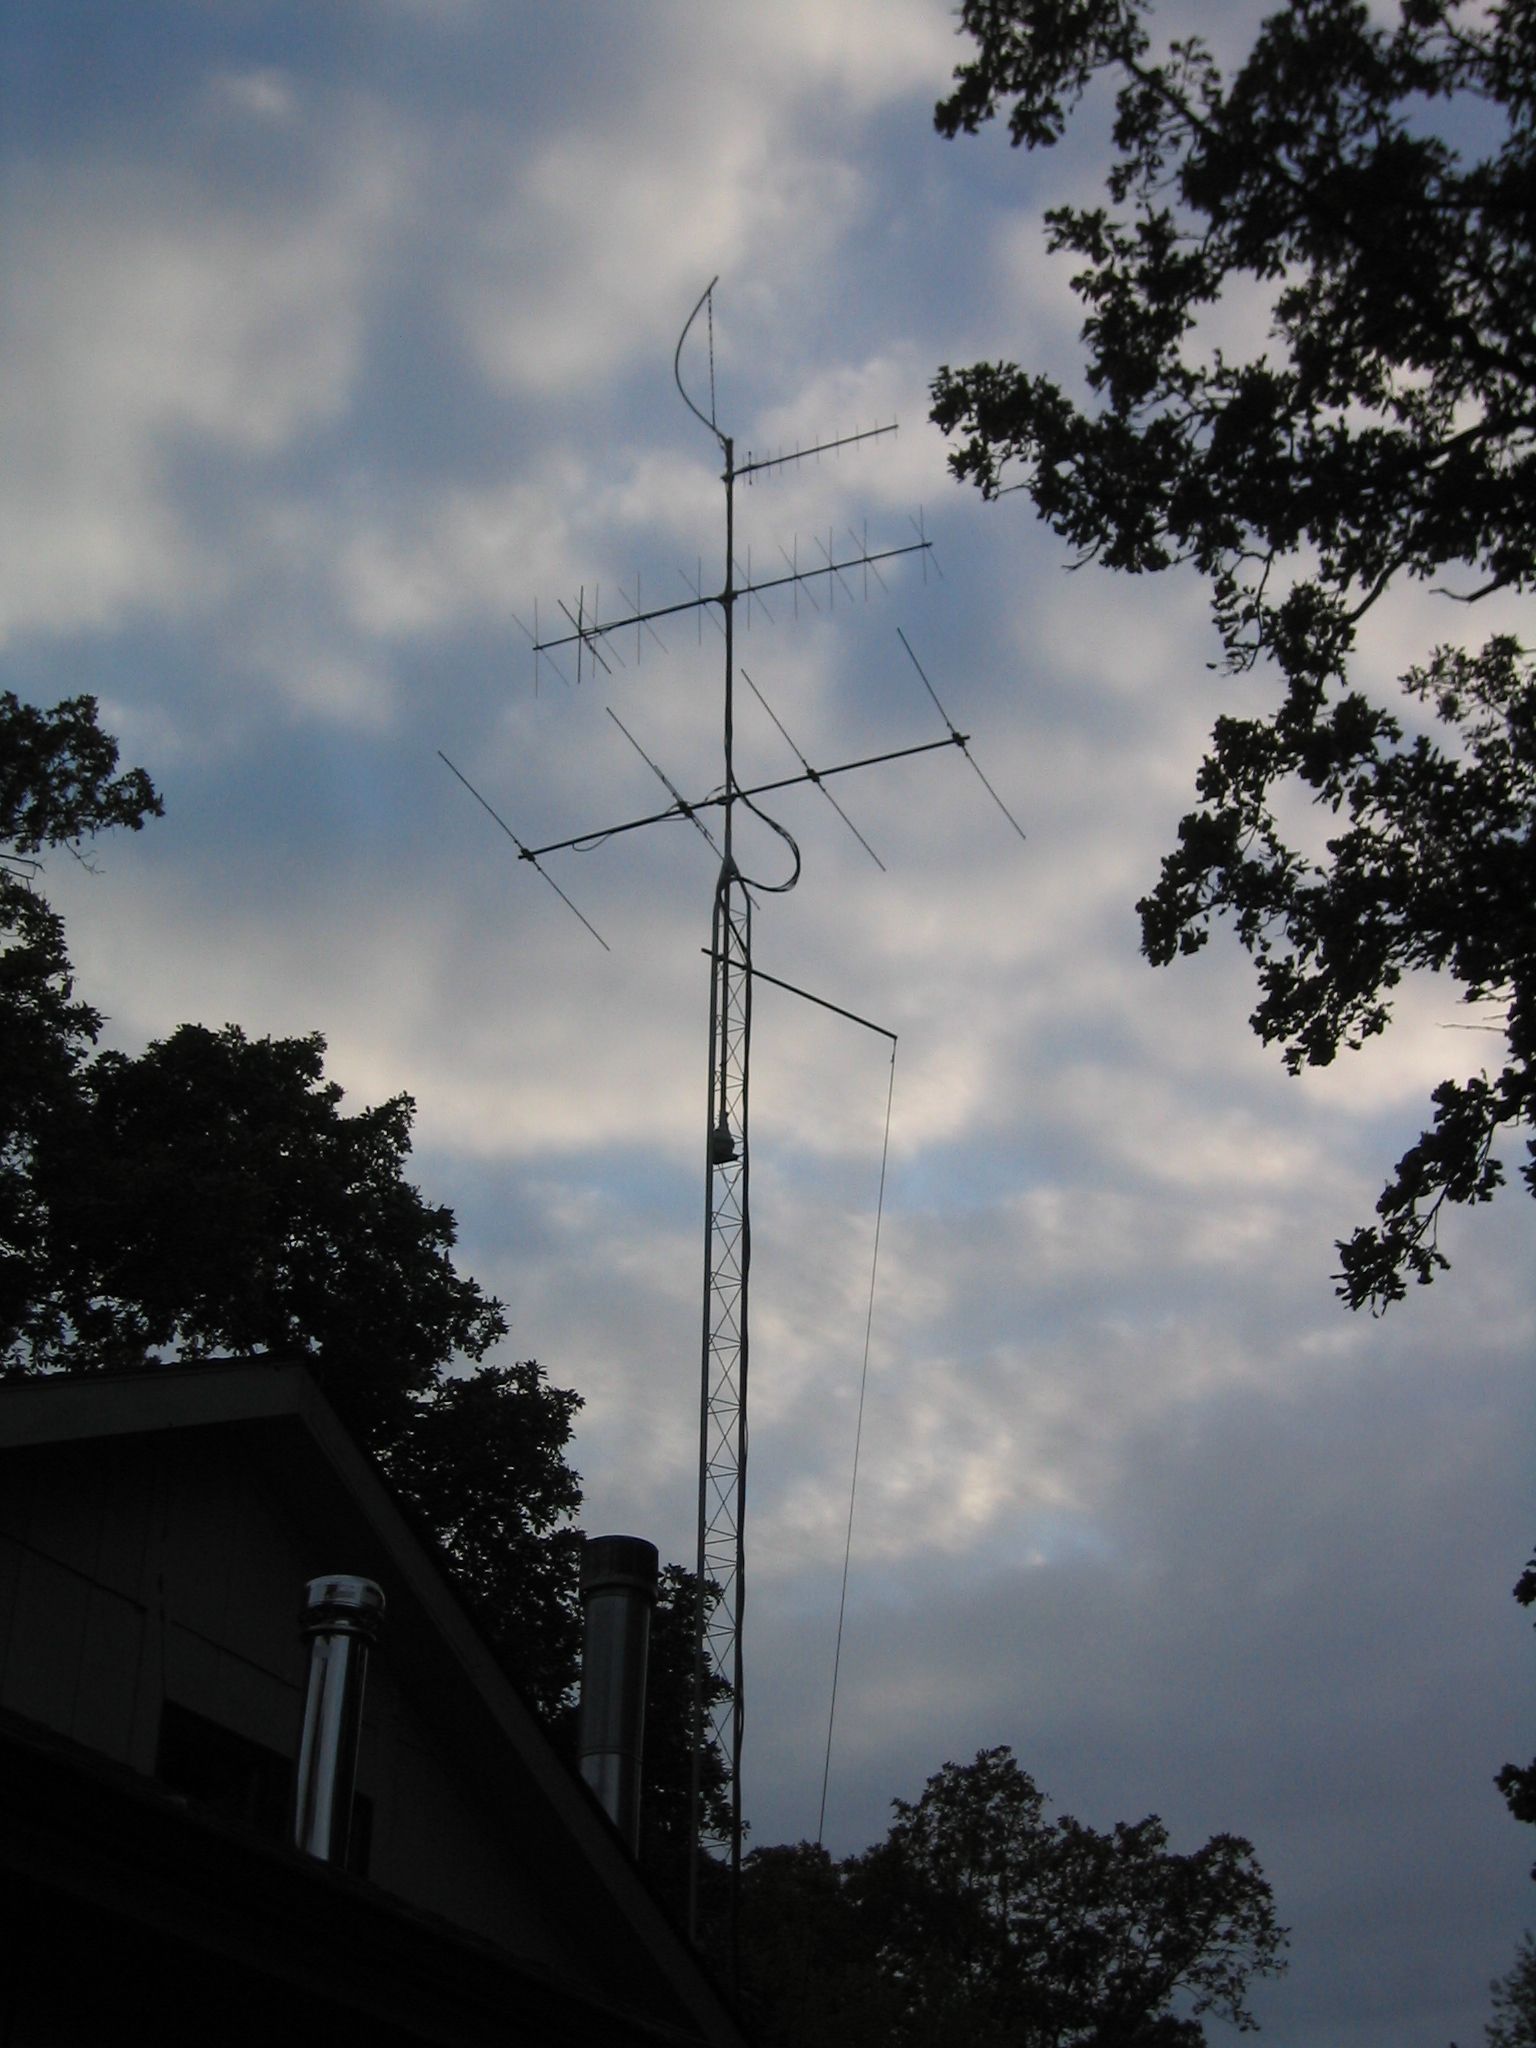 I'll tell you what that thing really talks up there I have worked repeaters over 100 miles away. Introducing the flag mast 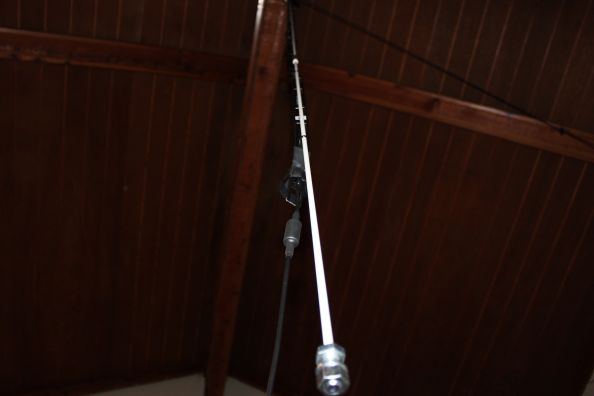 It is kind of a bad photo but this is an atv flag pole with the antenna attached. This is still not the perfect answer to rigid mounting but it is pretty good. As you can see there is an SAE 1/2" stud with a nut and lockwasher at the bottom. This makes it very easy to come up with a mount for the antenna. You can also use a fishing pole the same way but if you want a permanent roof installation I would stay with the flag mast. I purchased this mast at the local Honda ATV shop for $10.70 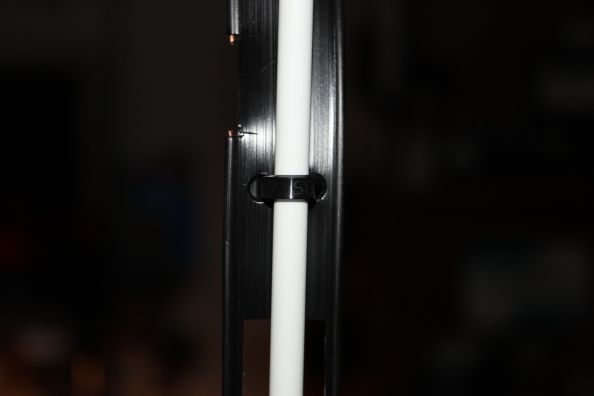 By punching hole pairs in the antenna like is done at the bottom to hold the coax in place we can get the fiberglass rod into the middle of the antenna where it can do the least amount of de-tuning to the antenna. And now the bad news.....
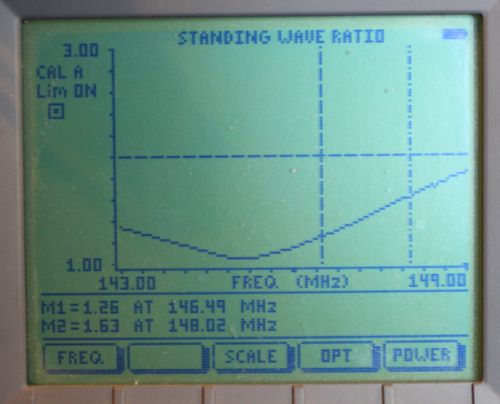
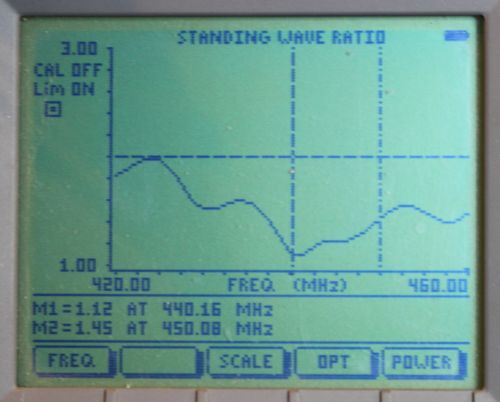
As you can see we have lost our perfect tune to 146.52. This is not the end of the world as we still have a very good SWR on the entire band. As with everything in life there are tradeoffs. Lets look at 440.
As you can see we have the same effect on 440. The antenna feels electrically longer as the mast has changed the velocity factor of the ladder line. Still it is not that bad. In conclusion, this is a workable mount for the antenna. Many of my customers want to purchase these antennas and put them into PVC. I can understand as it is an inexpensive alternative to purchasing a $150 fiberglass dual band vertical antenna. Please stay away from the insertion into PVC because if you think the rod has affected the antenna badly pvc has about 20X the affect. The bow remains the only non frequency altering method of roof mounting the antenna. The antennas are available with an assorted connectors and with or without long coax cable. The VHF only antennas are custom tunable from 136 - 999 mhz at no extra charge. (Tuning from 88-136 are available with slight extra charge for added material and shipping weight.) Antennas from 400-999 are made from 300 ohm ladder wire as they perform better with the thinner wire. Thank you for your interest in my antennas. Joe N9TAX The link below will take you to my webstore where you can buy one.  |
|
|
